brief introduction
Doraos (formerly known as jyos) is a thin client software that supports the transformation of old x86 computers into professional thin client systems.
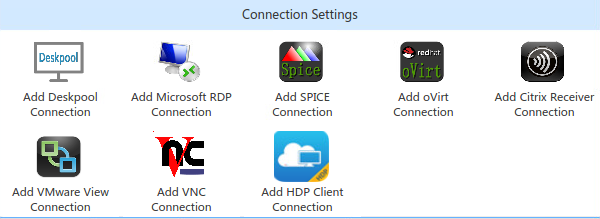
Doraos supports desktop connections such as deskpool, RDP, spice, ovirt, Citrix receiver, VMware view and Huawei HDP.
Common x86 processors supported by DoraOS include: 1037u, J1900, j1800, j3160, I3 / i5 / i7… And so on. Z8355 CPU is not supported.
1.Installation of DoraOS
1.1 Download DoraOS installation files
Download and try the DoraOS system on the official website
1.2 Make DoraOS launch USB disk
1)Making startup disk with rufus
2)As shown in the figure, select the system file and click start
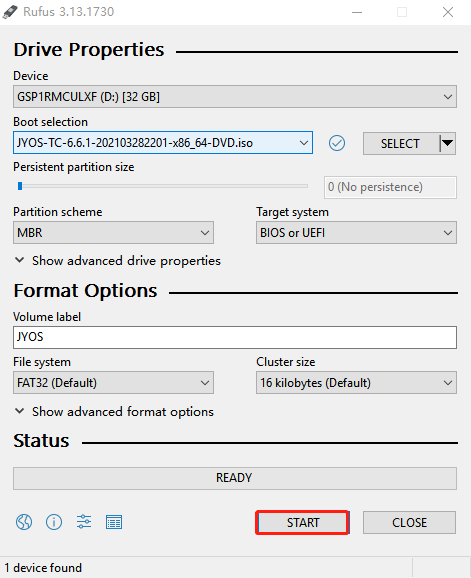
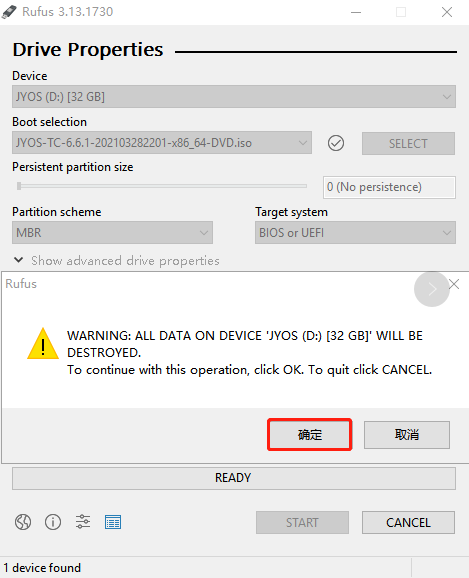
3)Format the disk and write it. Click OK.
1.3 Installing the DoraOS client system
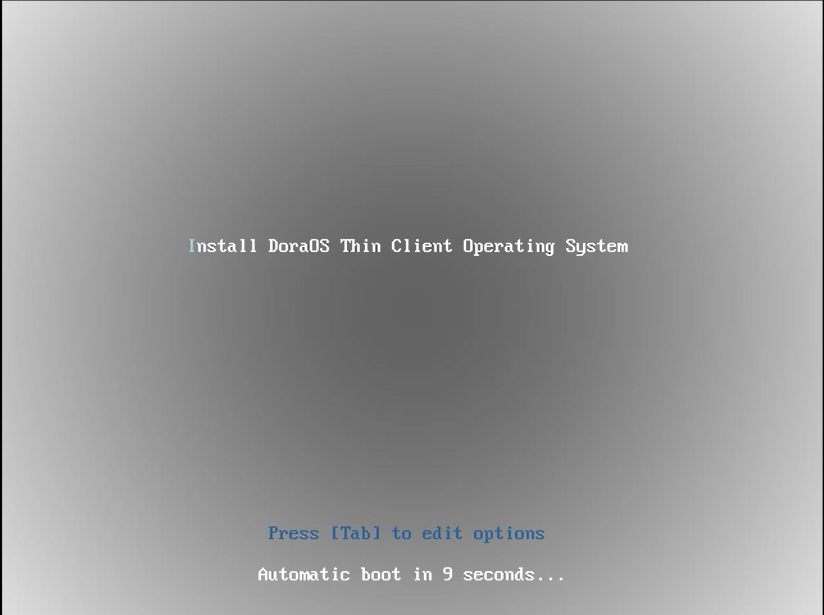
1)Use BIOS startup mode (do not start with UEFI mode), as shown in the following figure, click enter.
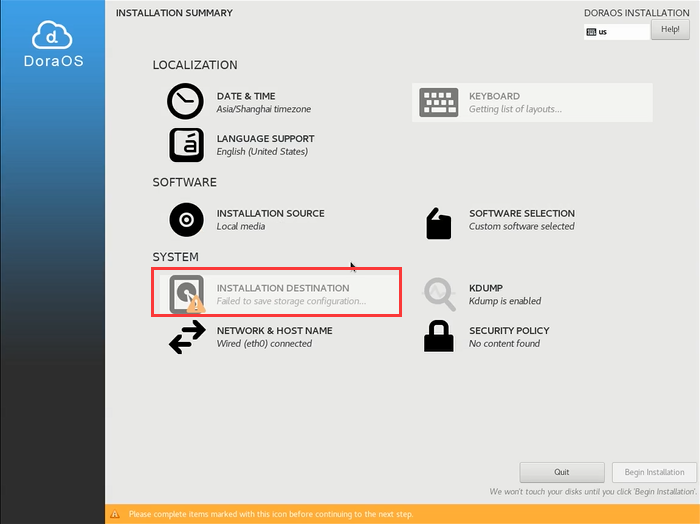
2)Enter the configuration page and click in the red box to partition the disk.
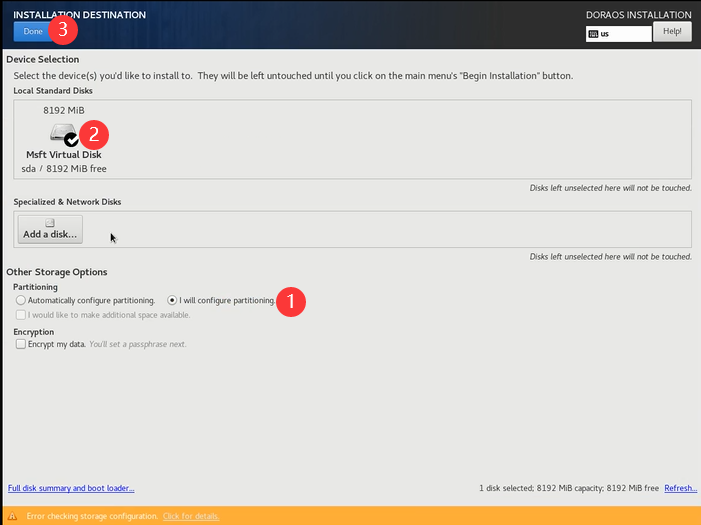
3)Disk selection, system installation will format the disk, pay attention to select a good disk.
a:Select disk
b:Select Manual partition
c:Choose done
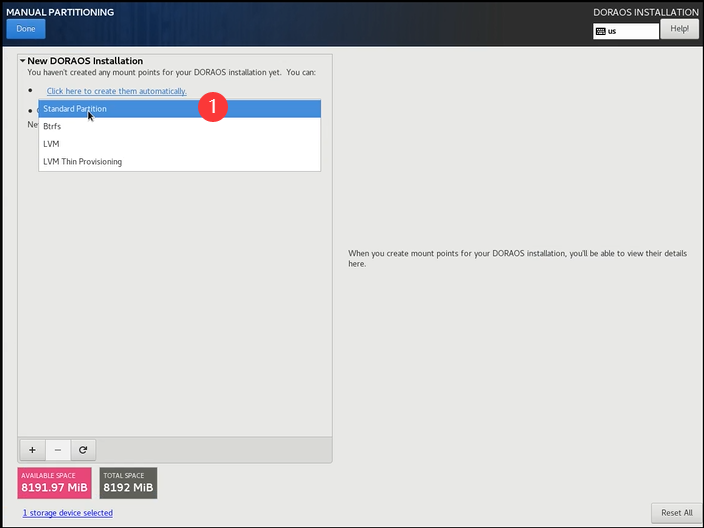
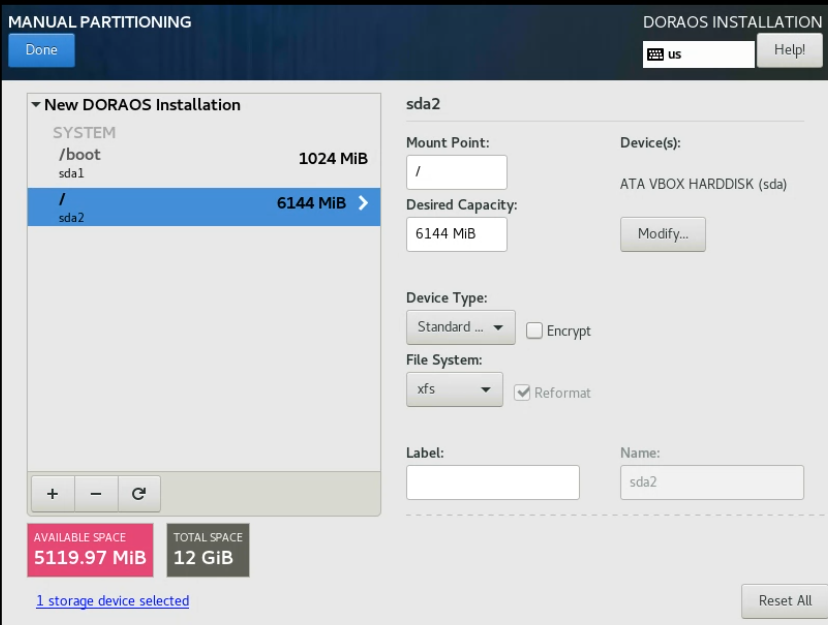
4)create a partition
Select standard partition
5)Add boot partition / boot 1G and root partition / 5G.

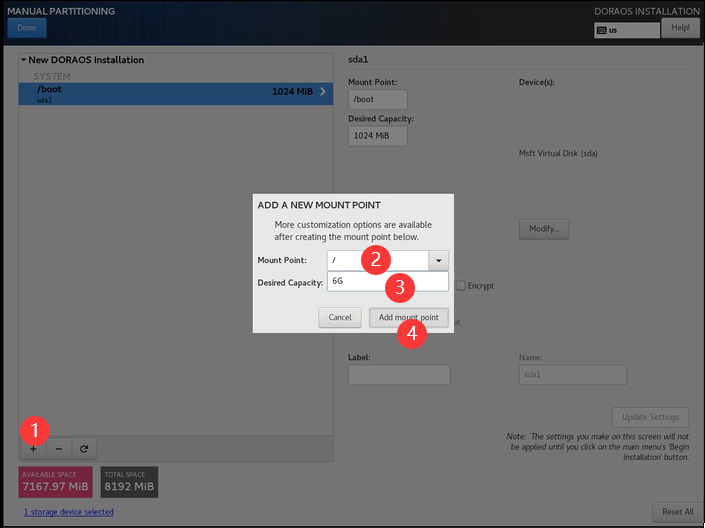

6)File System choice ext3,Click twice on done in the upper left corner.
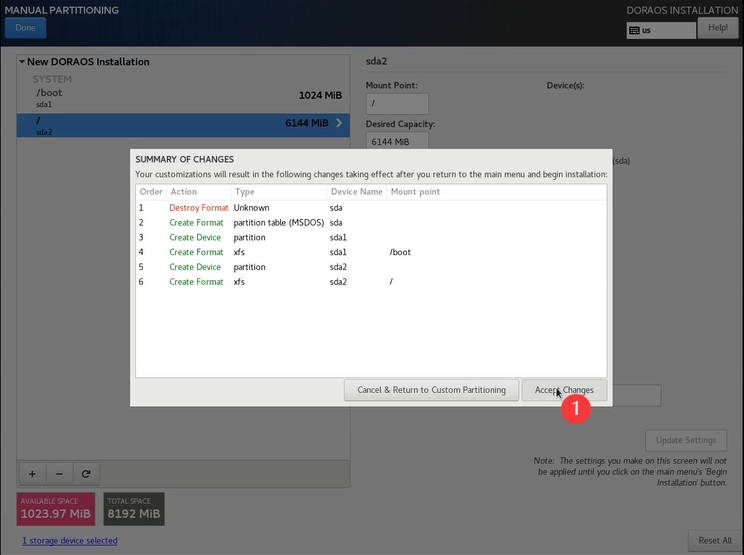
7)Click accept change.
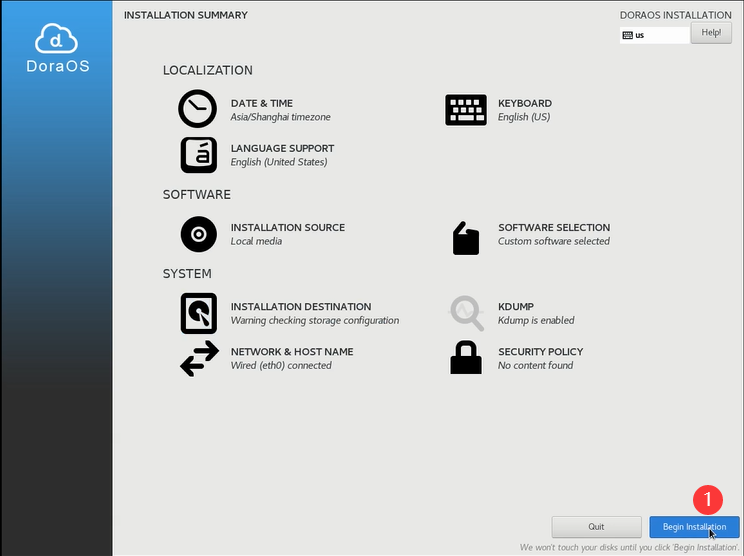
8)Click begin installation to continue the installation.
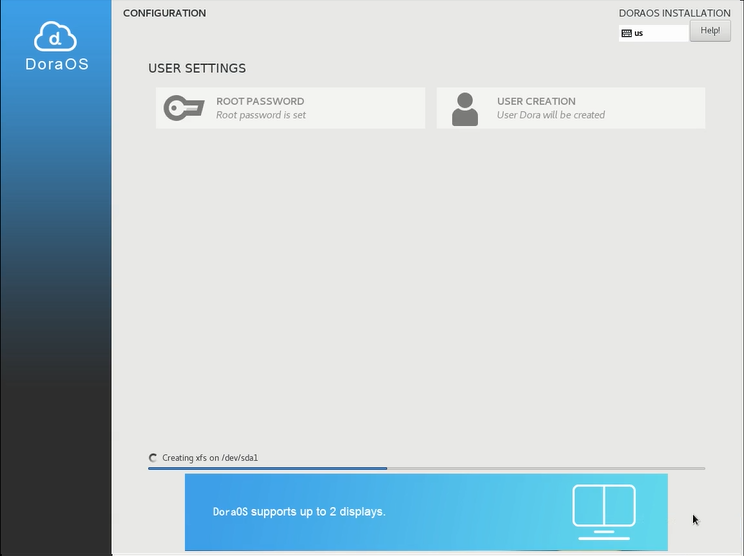
9)The configuration is completed, the system is being installed, and you need to wait about 20 minutes.
10)The system needs to be restarted manually after installation.
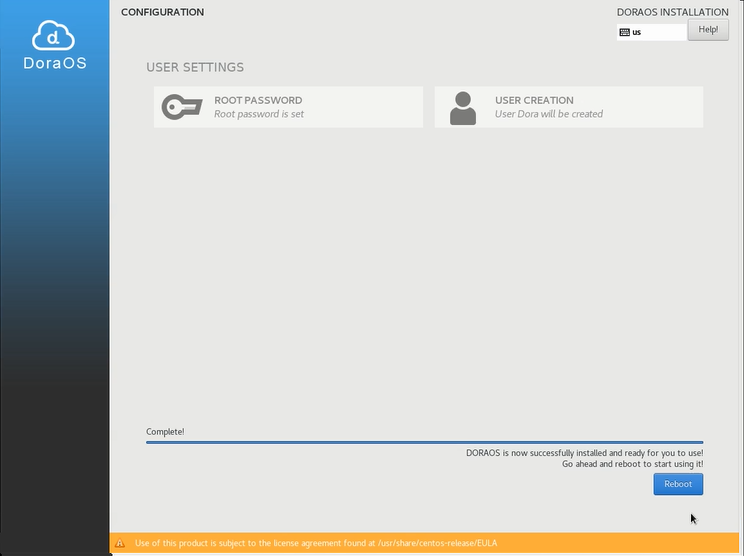
After the system is restarted, it can be used for 30 days for free. If you need to activate the system, please contact Dora cloud Technology Co., Ltd www.deskpool.com Get the activation code. See the information in the figure below to show that the jyos system is installed successfully.
2.The use of DoraOS
2.1 Activation of DoraOS
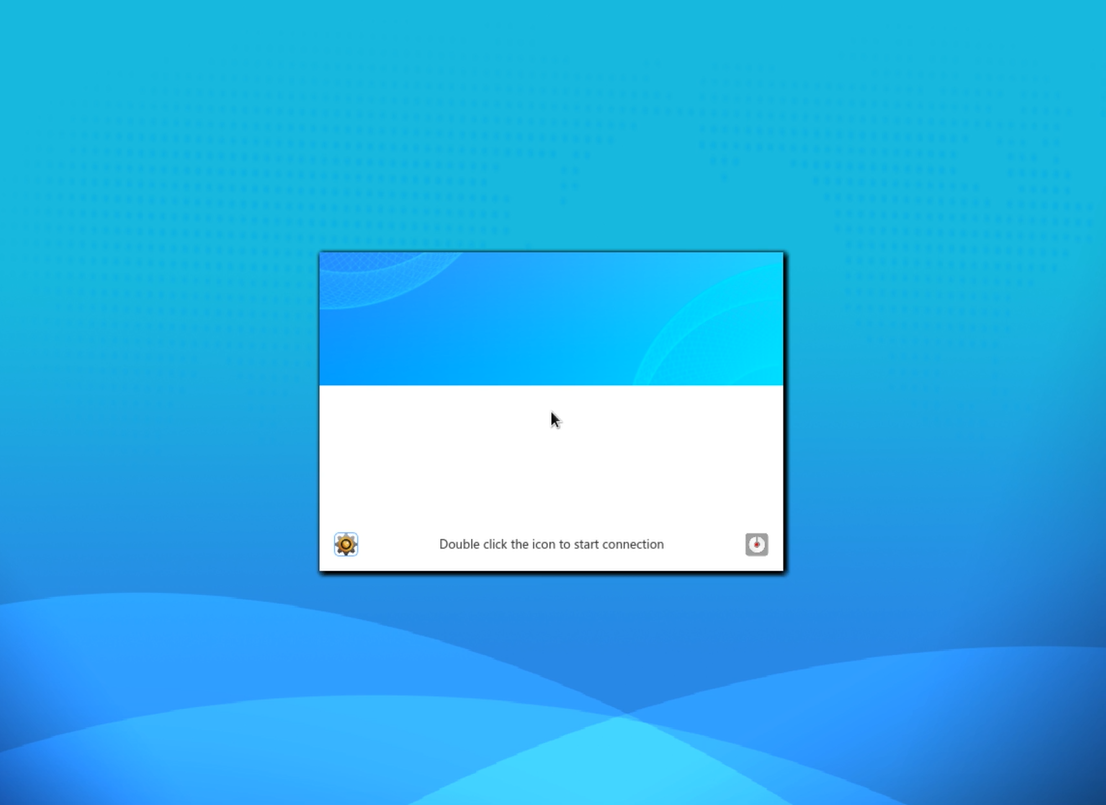
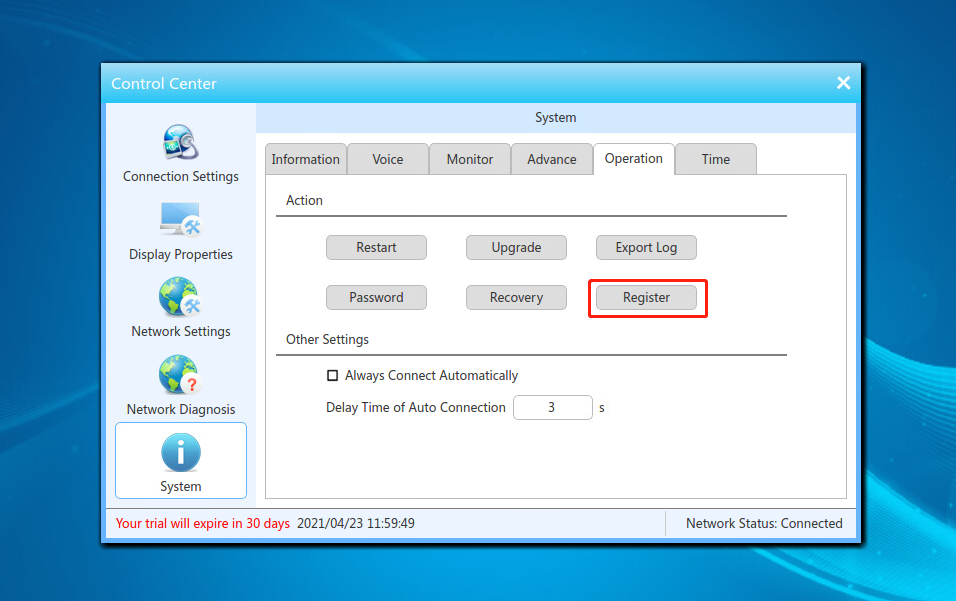
After the installation, click the pinion icon and click “system” - “operation” - “registration” in the left list.
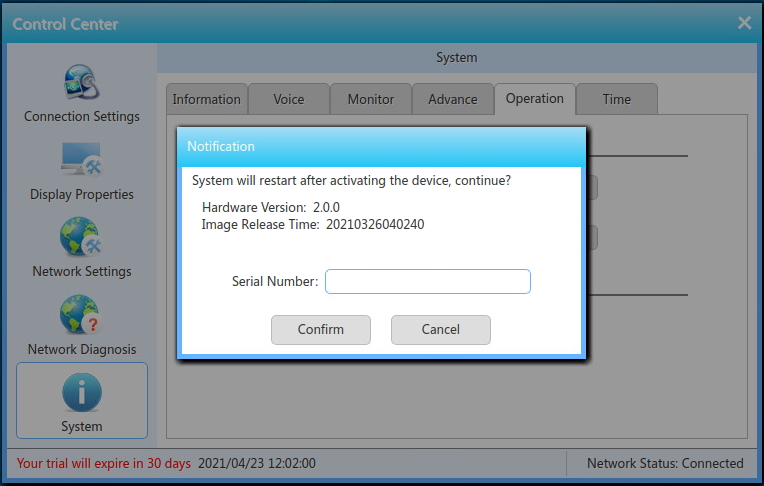
Input the serial number to complete the activation, as shown in the figure
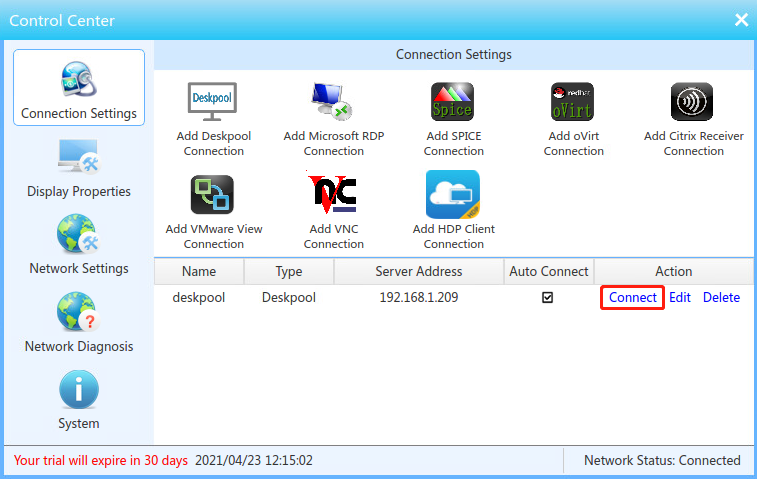
2.2 Configure Desktop Connection
DoraOS supports multiple connection modes. Let’s take “deskpool” connection as an example.
2.2.1 Configure deskpool connection
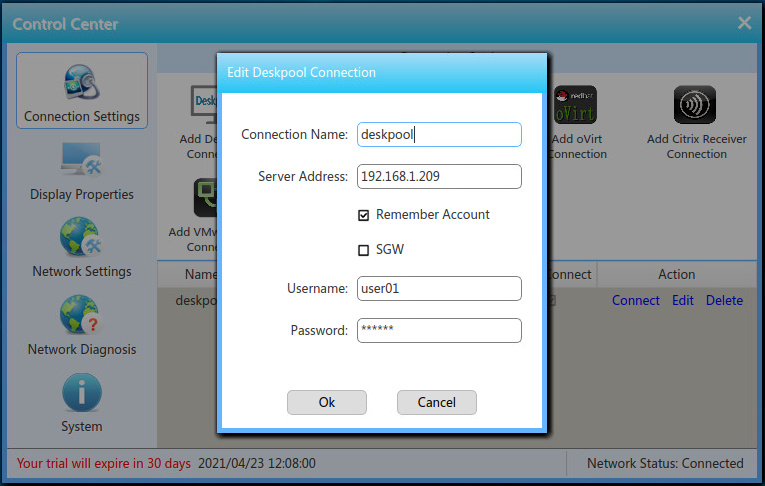
Click add deskpool connection to set up a deskpool connection, as shown in the figure below
Connection name : it uniquely identifies the connection and cannot have the same name.
Server address : the URL or IP address of the remote desktop server.
User name : deskpool desktop virtualization platform user account.
Password : the login password of deskpool desktop virtualization platform user
Supplementary notes:
1.In the deskpool login interface or user interface, press F6 to return to the configuration center interface.
2.After connecting to the remote Windows desktop, you can press Shift + F12 to disconnect and return to the deskpool user interface.