Deskpool support Promox 5.x, 6.x,7.x. You can install Deskpool online.
Install Proxmox 6.3
- Download Proxmox ISO image
https://www.proxmox.com/en/downloads
- Boot from USB or CD/DVD
Use rufus create a bootable usb key.
Use the usb boot and install Proxmox.
- Login to the proxmox web portal by browser.
https://<Proxmox_ipaddr>:8006
Install Deskpool on Proxmox
Options 1: One click install script
Login to the Proxmox linux shell, and execute the one line script
cd /var/lib/vz/dump; wget -qO- http://dl.deskpool.com/dpinstall.pl | perl
When finished executing the script, it will show “Access deskpool by http://xxxxxx "
Open the URL by browser , the default account is admin / deskpool.
Options 2: Download and install
- Downloads Deskpool for Proxmox from
http://www.deskpool.com/downloads/deskpool-pve/
- Upload Deskpool manager vm to Proxmox Server directory: /var/lib/vz/dump
scp vzdump-qemu-500-2022_06_22-16_50_52.vma.zst root@<Proxmox_ipaddr>:/var/lib/vz/dump/
-
Restore Deskpool manager vm.
-
Start Deskpool manager vm. and the vm console will show the URL of the Deskpool admin portal.
-
Use brower to access the Deskpool admin portal.
Deskpool initial setup
The default administrator login account is username admin, password deskpool
Config Deskpool Hypervisor, Resource , Database, Cluster.
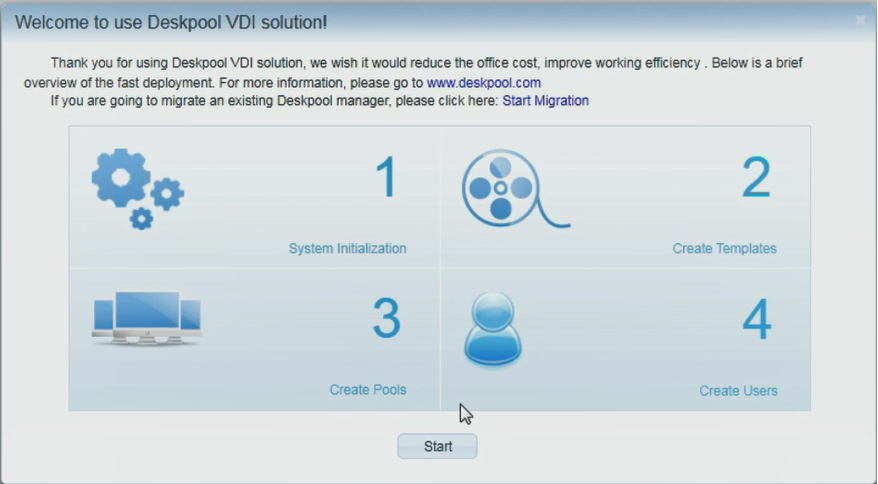
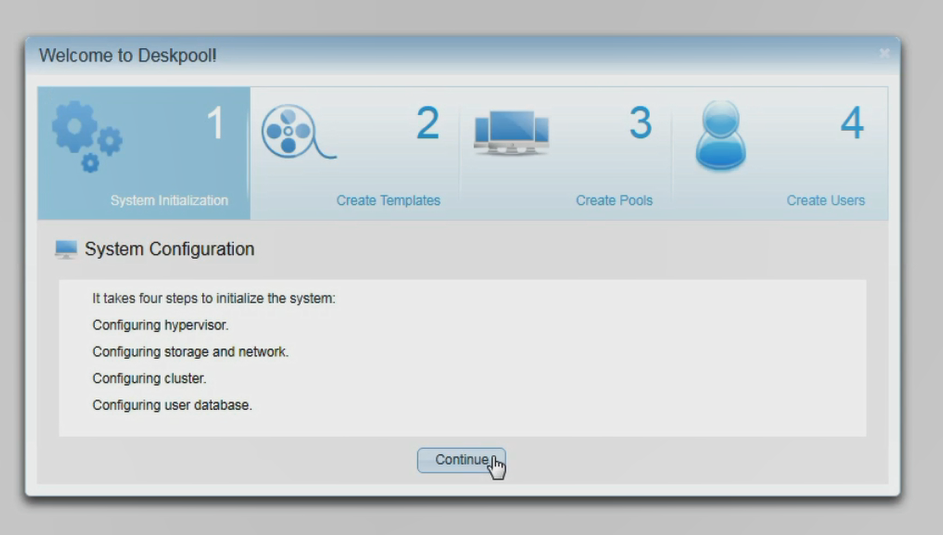
- As shown in the figure, click [start] , [continue].
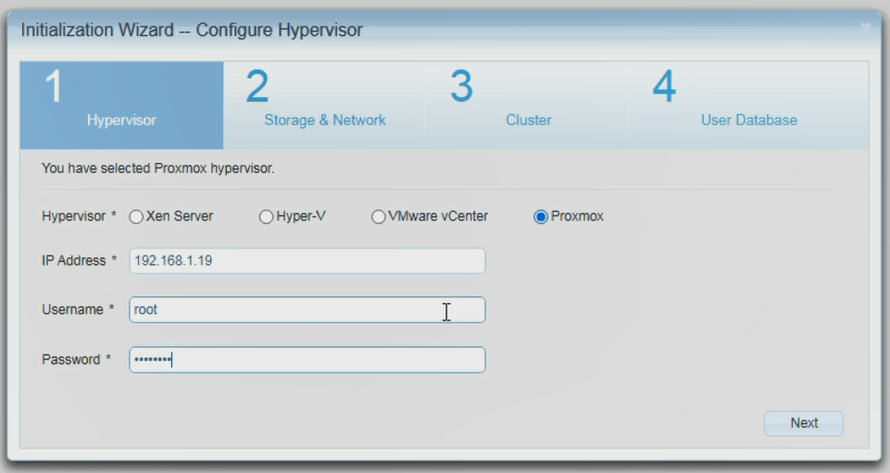
- Configuration Hyeprvisor: select the Proxmox input Proxmox server IP address and user (root), as well as the password, click next when the input is complete, and enter the configuration resource pool.
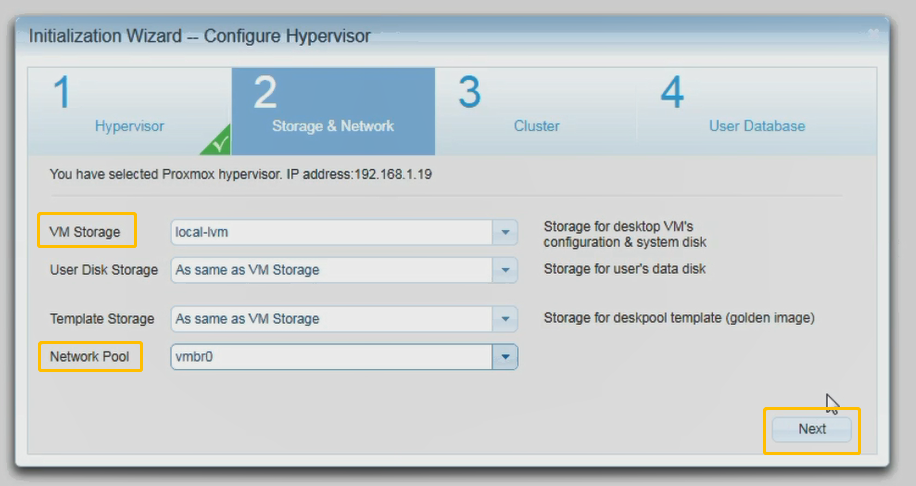
- Configure Resource Pool: desktop Storage Pool selection【local-lvm】 The network resource pool is configured with Proxmox virtual network. As shown in the following figure for【vmbrO】, click next when the configuration is complete to enter the cluster configuration.
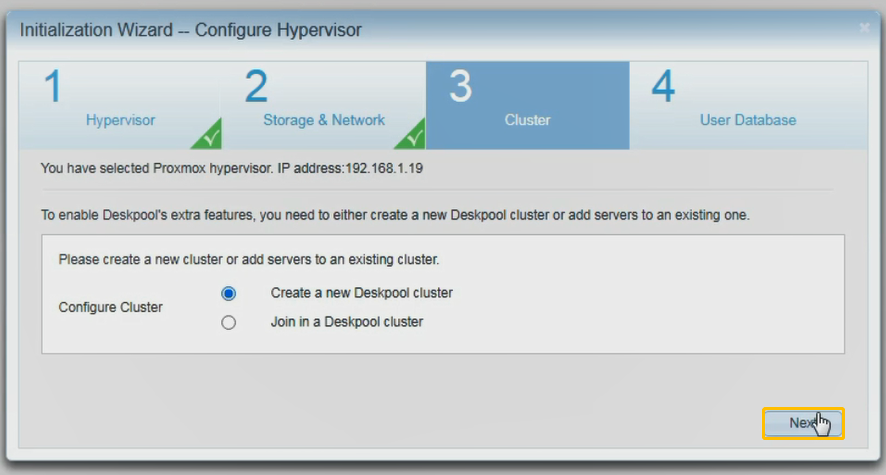
- Configure clusters: choose to create a new DoraCloud cluster.Click next to enter the configuration user database.
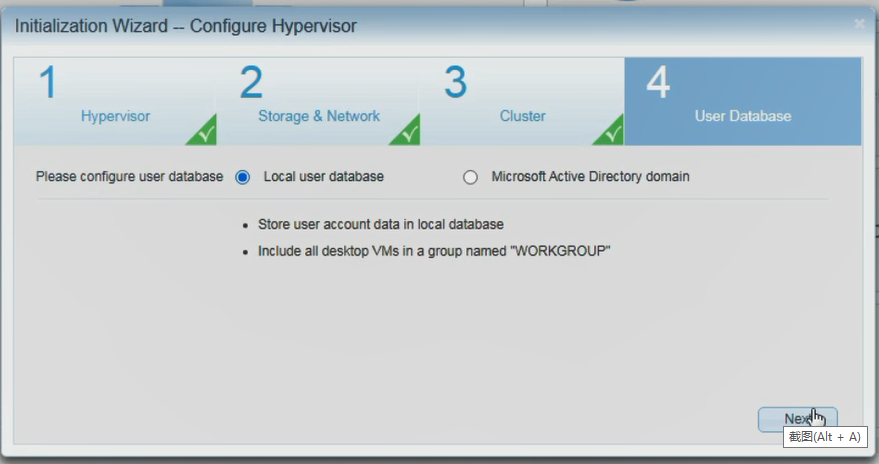
- Configure user database, select local user database and click next.
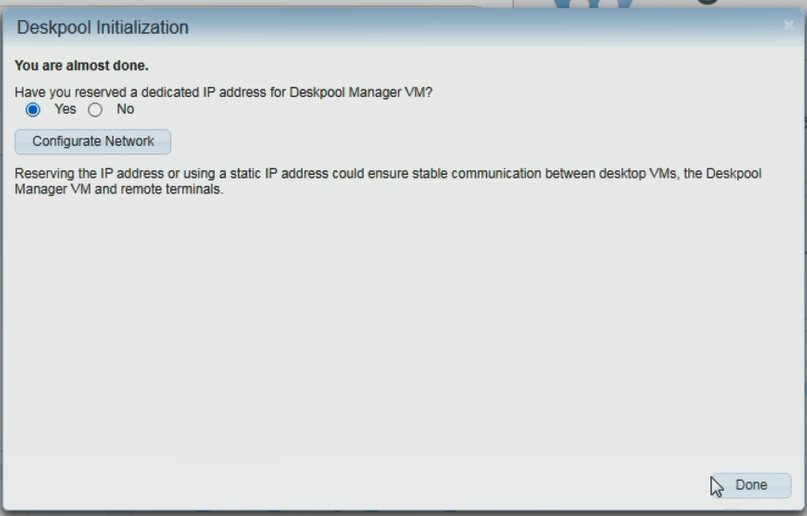
- Set the fixed IP, select “yes” and click the finish button.
Dowload template
Downloads desktop template from Deskpool image repository.
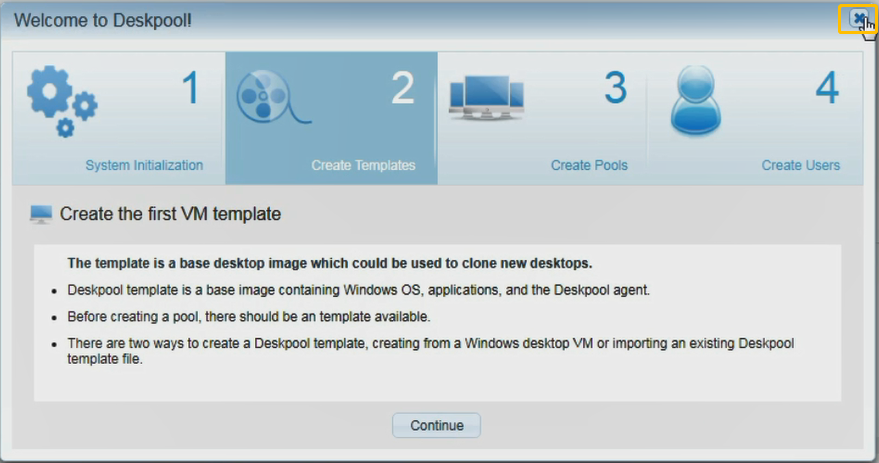
- Close the Deskpool setup wizard and click the menu [Templates].
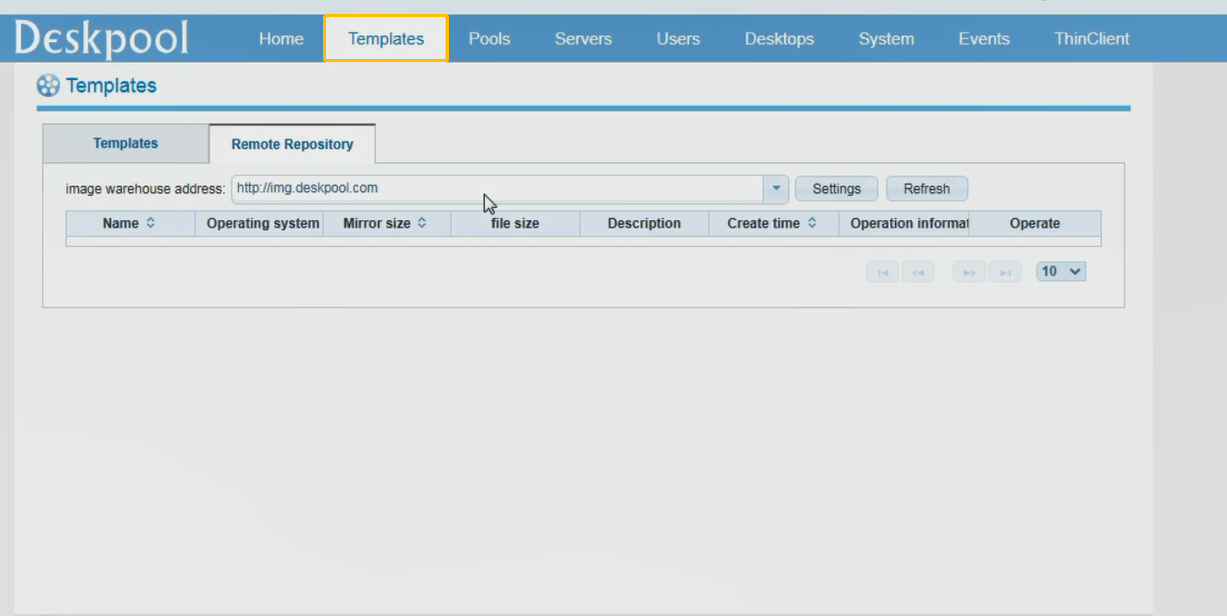
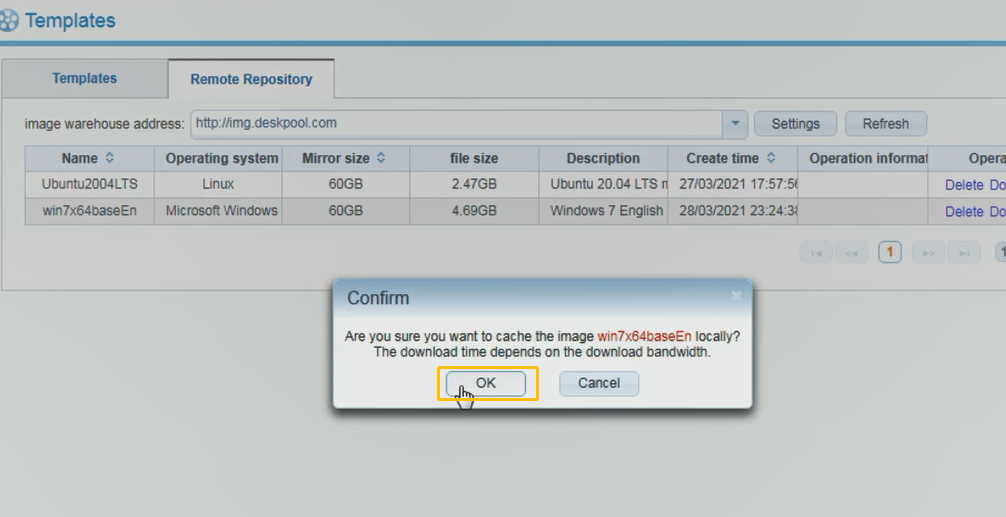
- Switch to the Remote Repository Tab and click [Refresh], then [downloads] the template win7x64baseEn.
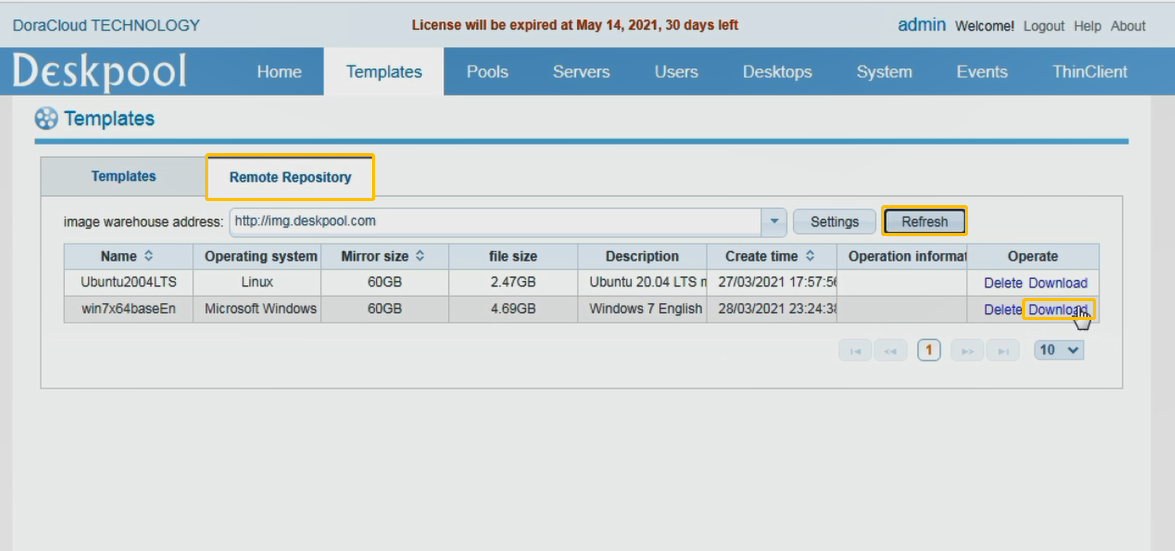
If the template list is empty. Please check the internet access of Deskpool VM and Proxmox. Both Deskpool Linux vm and Proxmox should has the internet access.
- Select the win7x64base template as shown in the figure to download, and recover the template after downloading
Config Pools, User Account
Config Desktop pools, Config User Account, User Group.
As shown in the figure below. Click desktop pool to enter the configuration desktop pool page.
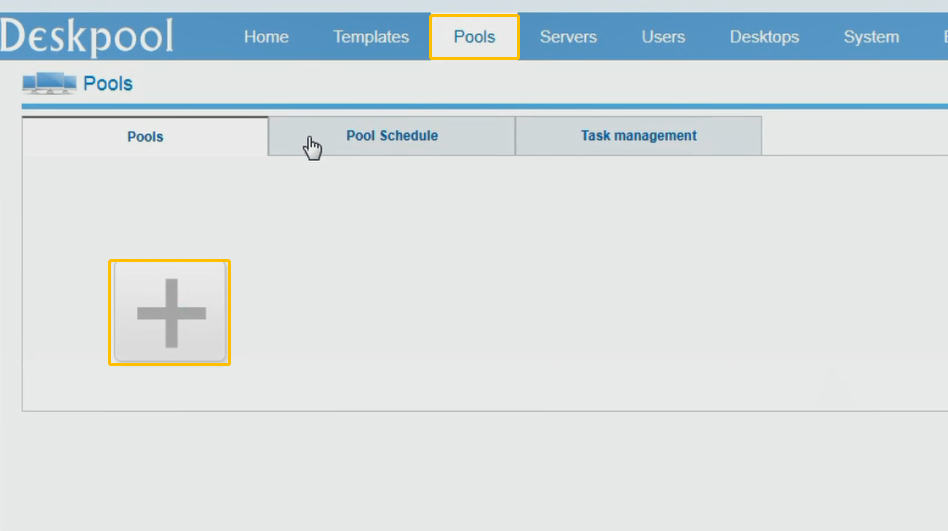
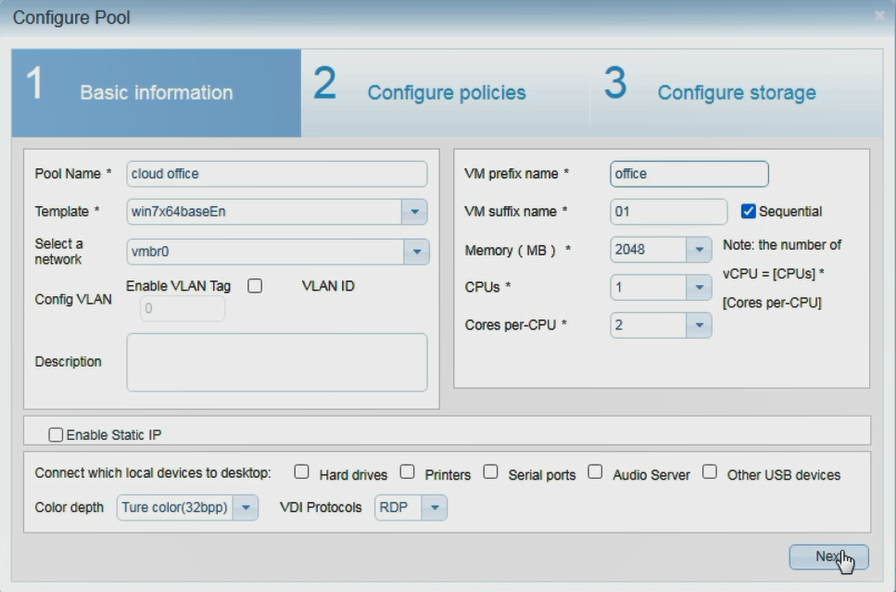
- Basic information: enter the name of the desktop pool, select templates and network resources for the desktop pool, and enter the prefix and suffix of the virtual machine. As shown in the figure below, click next to configure desktop pool policy.
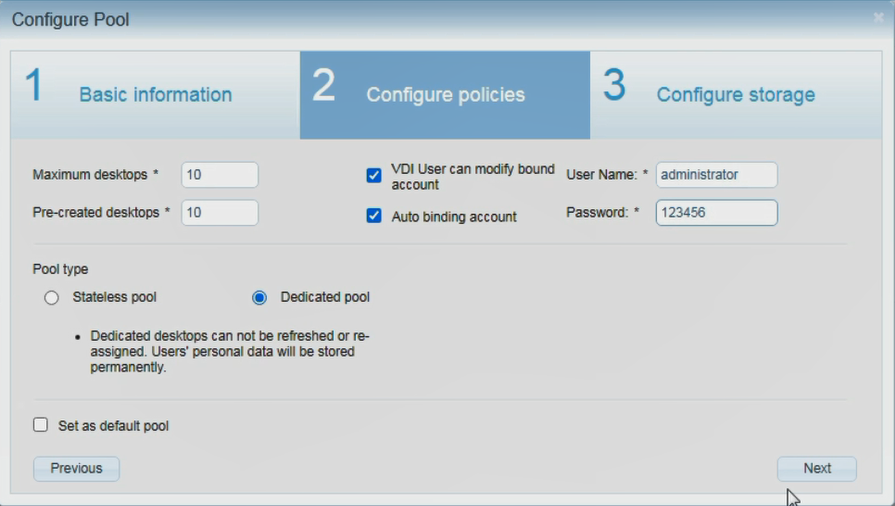
- Configure desktop pool policy: enter the maximum number of desktop virtual machines in the desktop pool and pre create desktop virtual machine parameters, and select the desktop type. Click next to enter configuration storage.
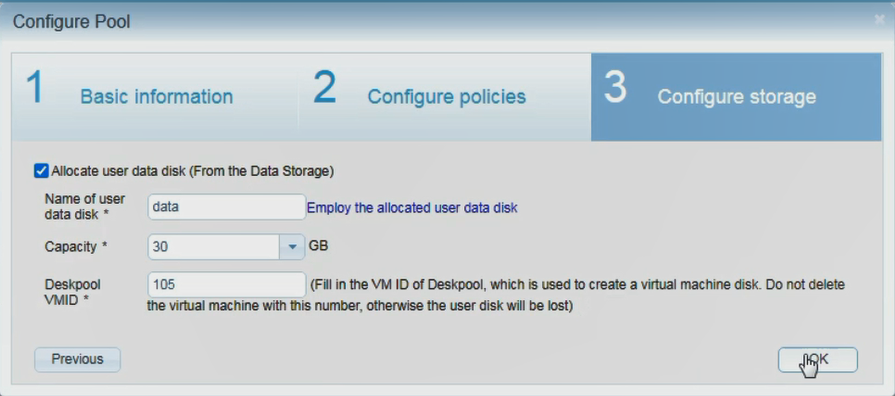
- Configure storage: set whether to enable the user data disk, and configure the name and capacity of the user data disk. The storage pool of the user data disk is specified in the system initialization phase.
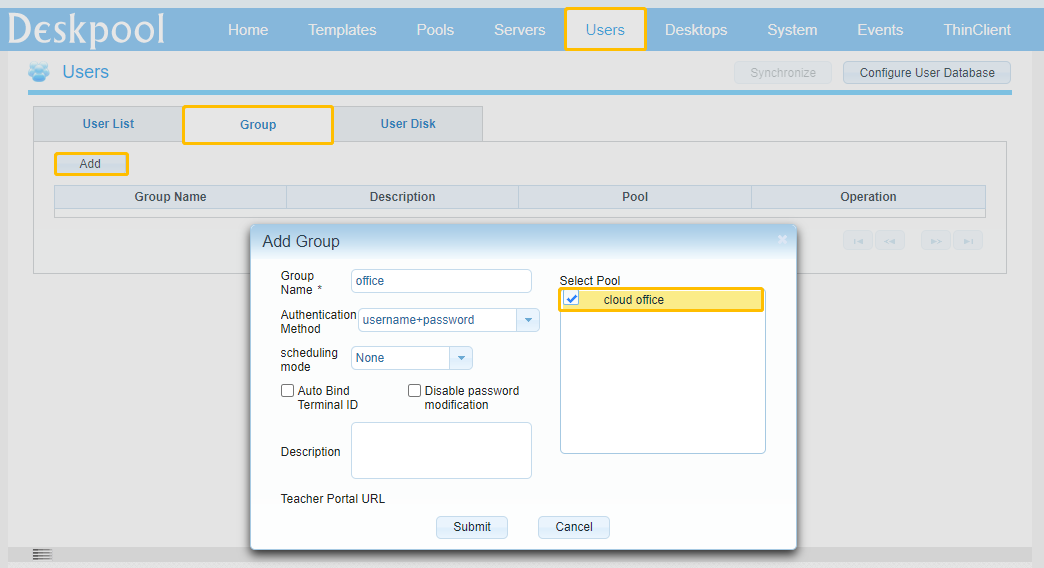
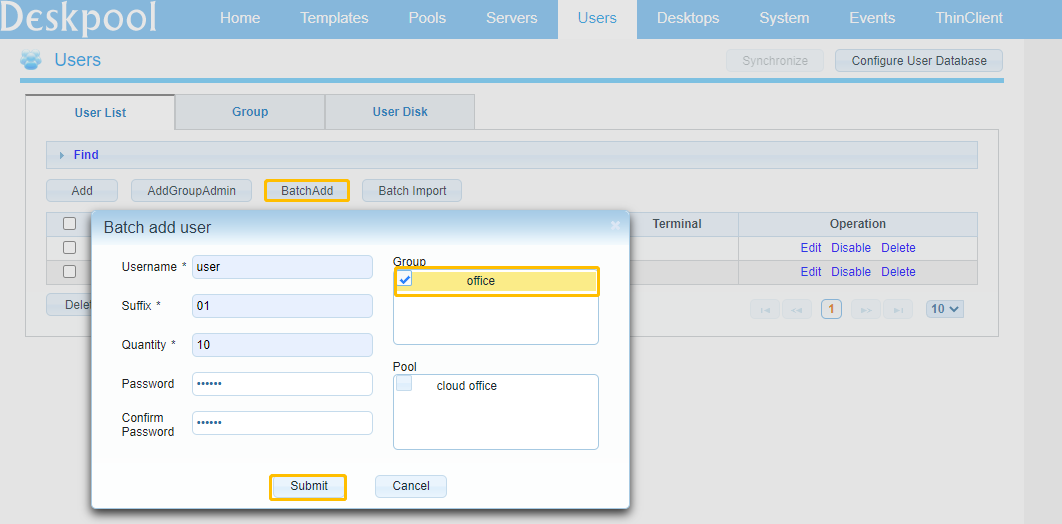
After configuring the desktop pool, as shown in the figure, click [user ] ->[ group]
- Add, fill in the group name and select the desktop pool
- Batch creation of users (can be created separately)
Connect to Deskpool VDI
Waiting Desktops vm creating finished, connect to Desktop VDI.
Method 1: use the old doraos or use Doracloud jc10 cloud terminal to log in to the cloud desktop
- Install Dora cloud thin client and connect it to the network
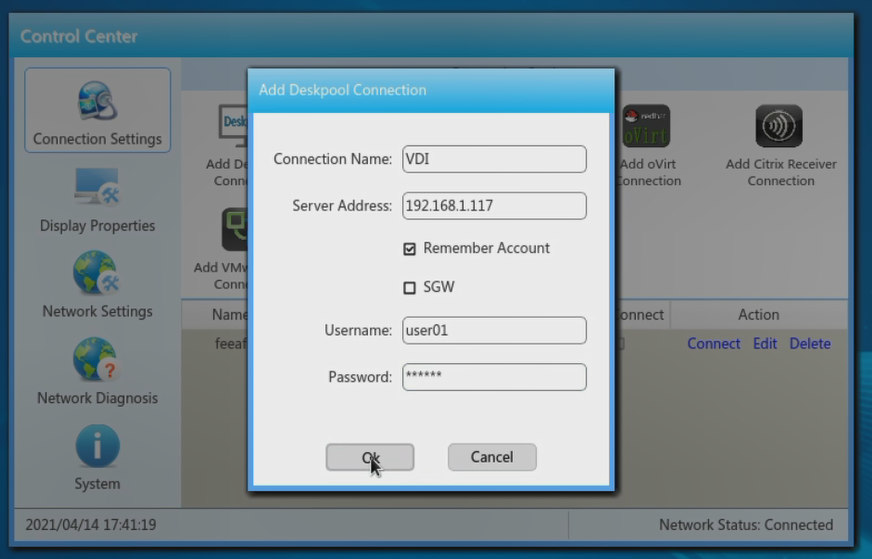
- Open the Dora cloud thin client, enter the settings page, and click the first “add deskpool connection”.

- Edit the deskpool connection and set the server address and connection name. Fill in the IP address of doracloud management system, not that of windows server,Then log in with the user name user01 and password 123456 created before, and you can connect to the desktop.
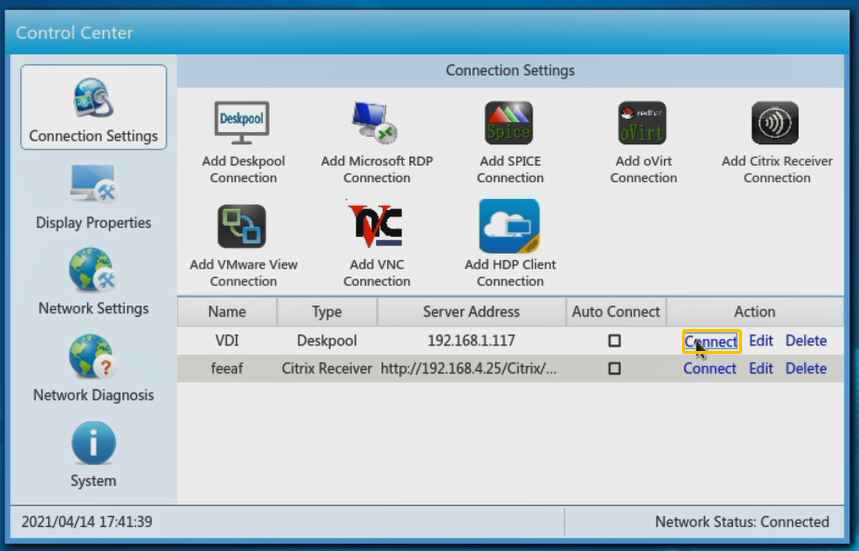
- After setting, click “connect” in the red box area to enter doracloud system.
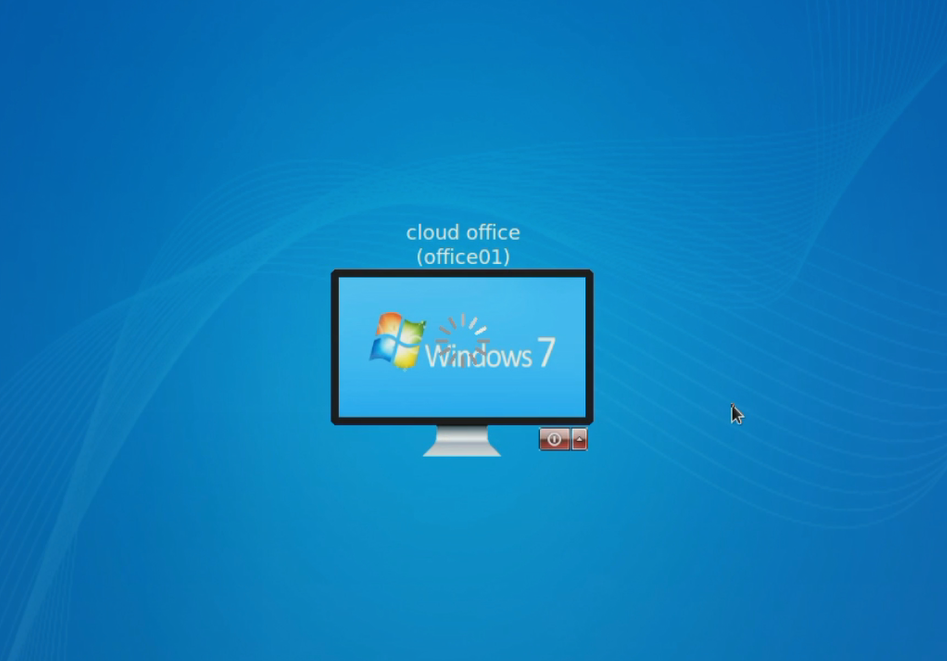
- Select the desktop and click to enter the system.
Method2: log in to the cloud desktop directly from the web page
If you log in to the cloud desktop with a web page, the use of USB will be limited. We can log in with a web page to test whether the created cloud desktop can log in normally, and test some functions of the desktop cloud
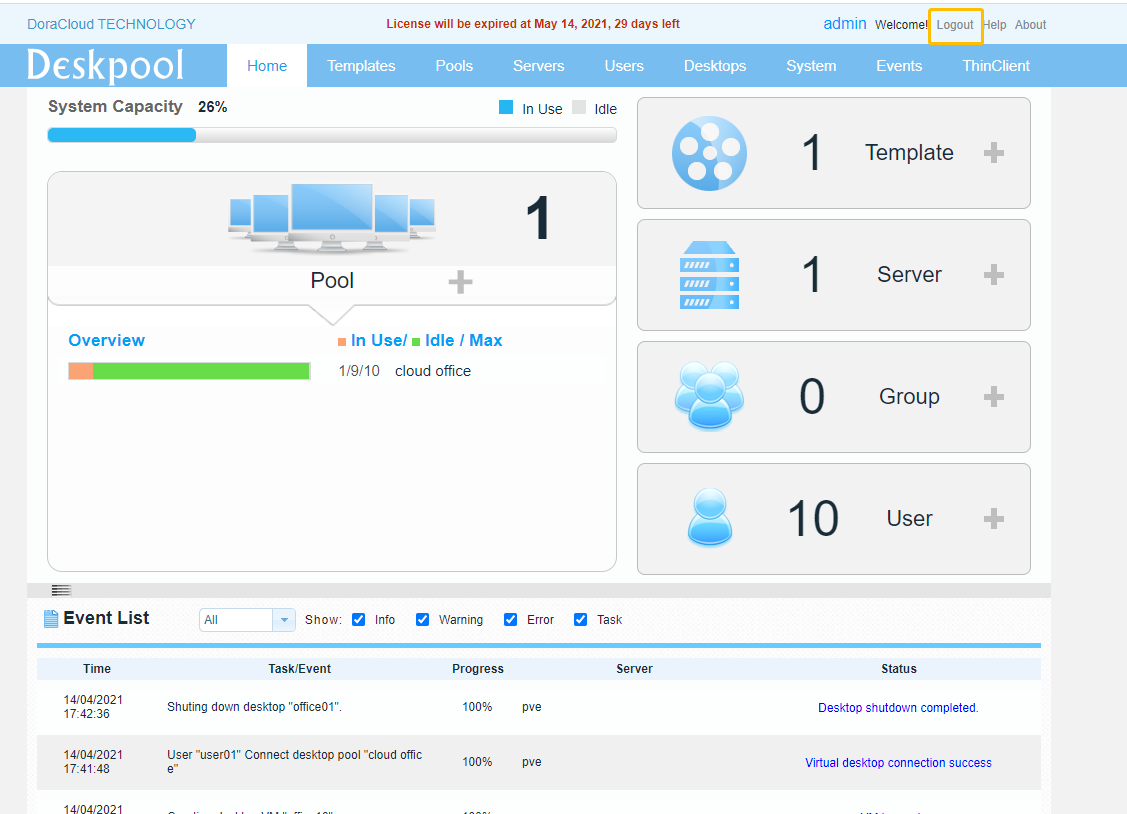
- As shown in the figure, we are logging into deskpool management background, and click the top right corner to exit.
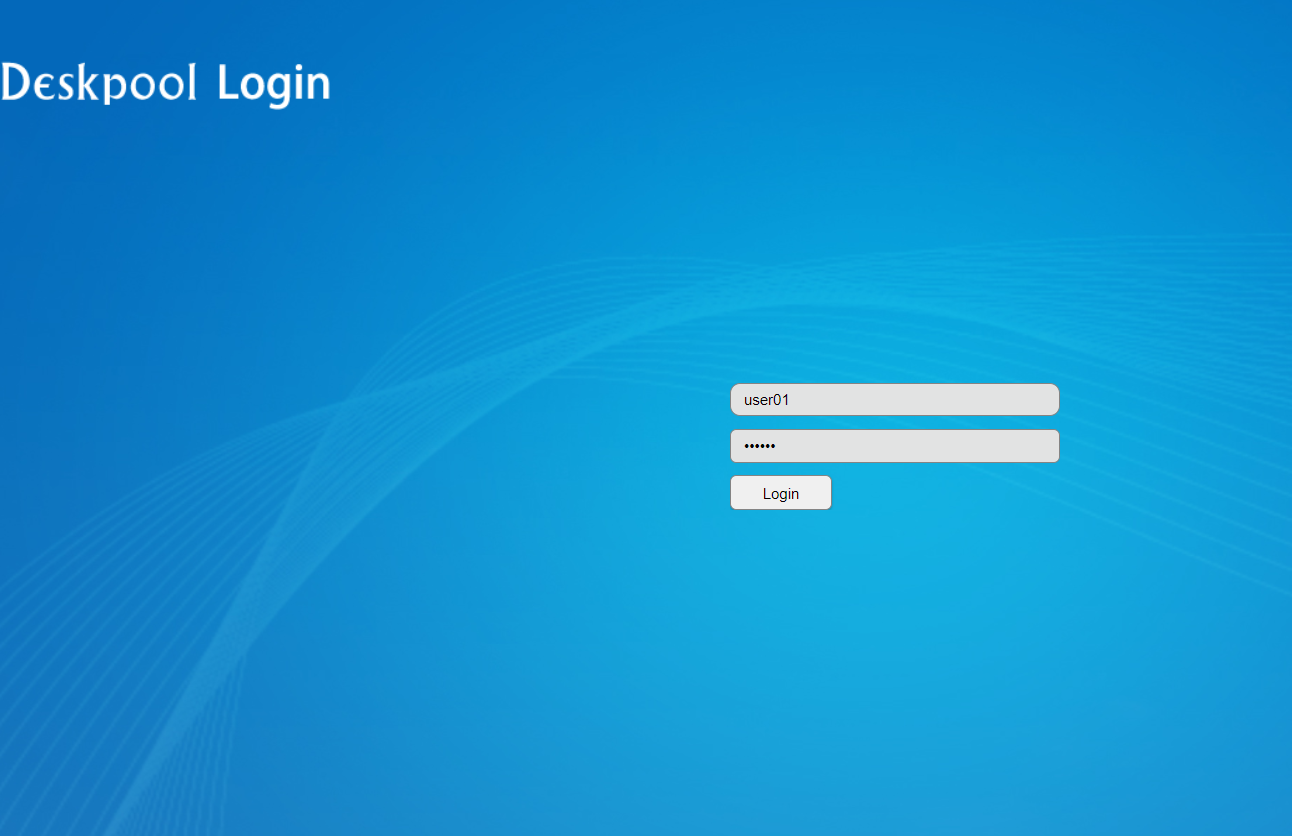
- Created before entering in the background login interface, user name: user01, password: 123456. After entering, click login.
- After the login is successful, the RDP file will be downloaded automatically. Click RDP file in the figure to connect the user desktop. After entering, enter the user name: administrator and password: 123456. Click login to enter the cloud desktop.


Note: if the desktop pool uses spice protocol. You need to install virt viewer on PC and log in with browser.